Cloudflare Tunnel Docker Compose: Expose Apps With No Open Ports
Set up Cloudflare Tunnel with Docker Compose in four steps: token, cloudflared container, service-name route and verification, plus the port 7844 firewall rule and replica failover.

On this page
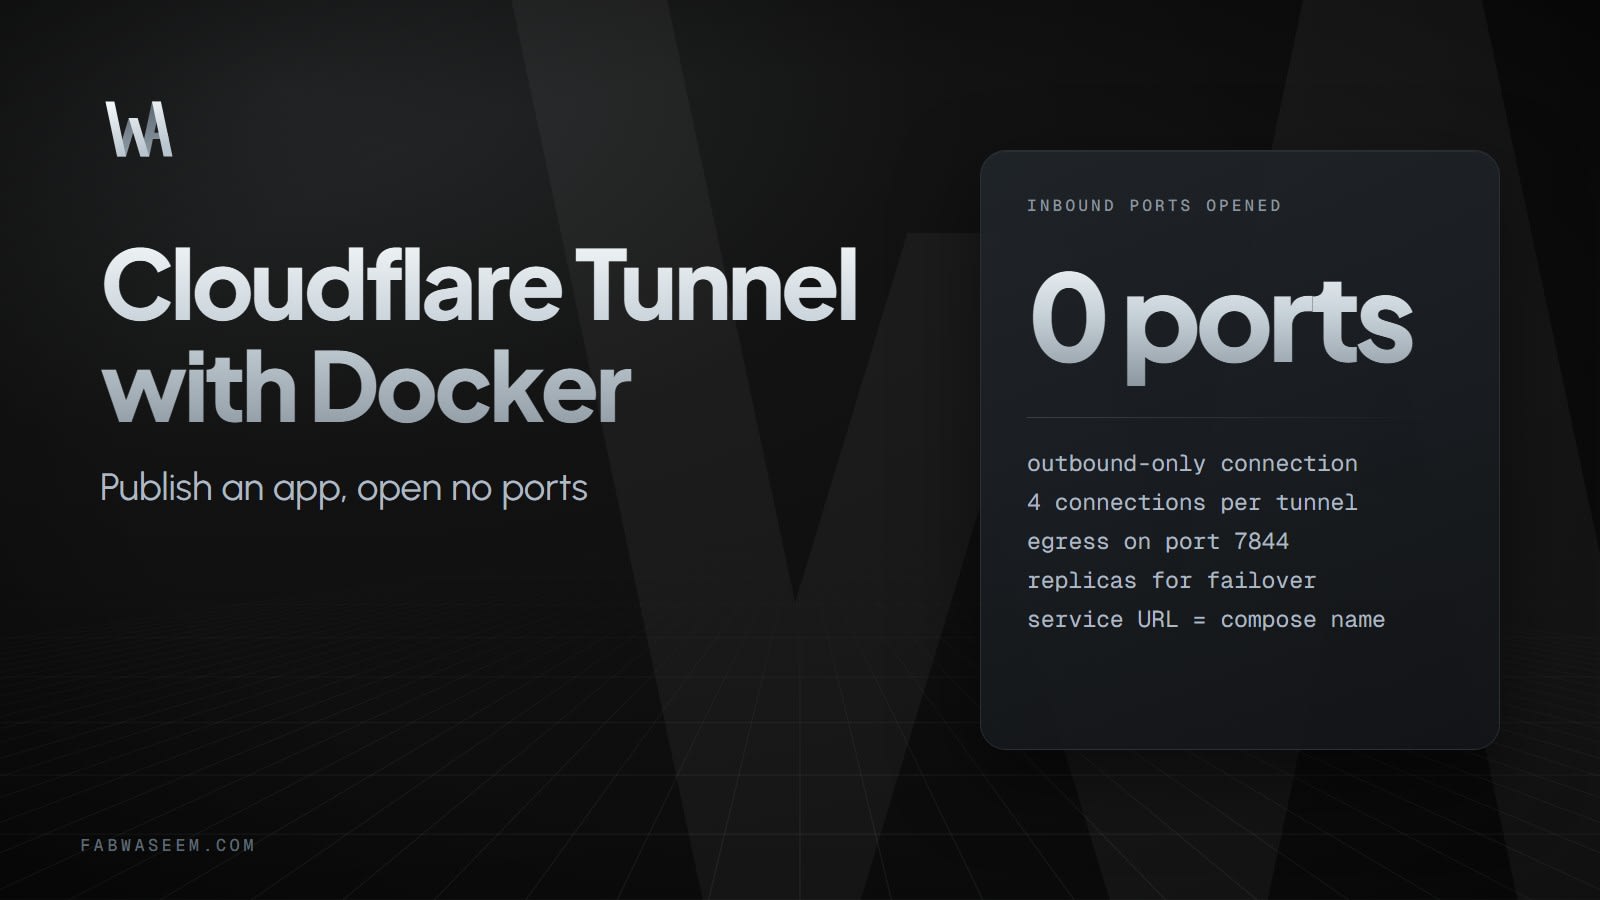
A Cloudflare Tunnel Docker Compose setup is one extra container: run cloudflare/cloudflared next to your app, give it a tunnel token, and add a published application route that points at your app's service name. Cloudflare Tunnel uses an outbound-only connection model, so you open no inbound ports and your server needs no publicly routable IP address. This guide walks through the full setup, the localhost mistake that causes 502 errors, and when a tunnel is the wrong tool.
What is Cloudflare Tunnel and why use it with Docker?#
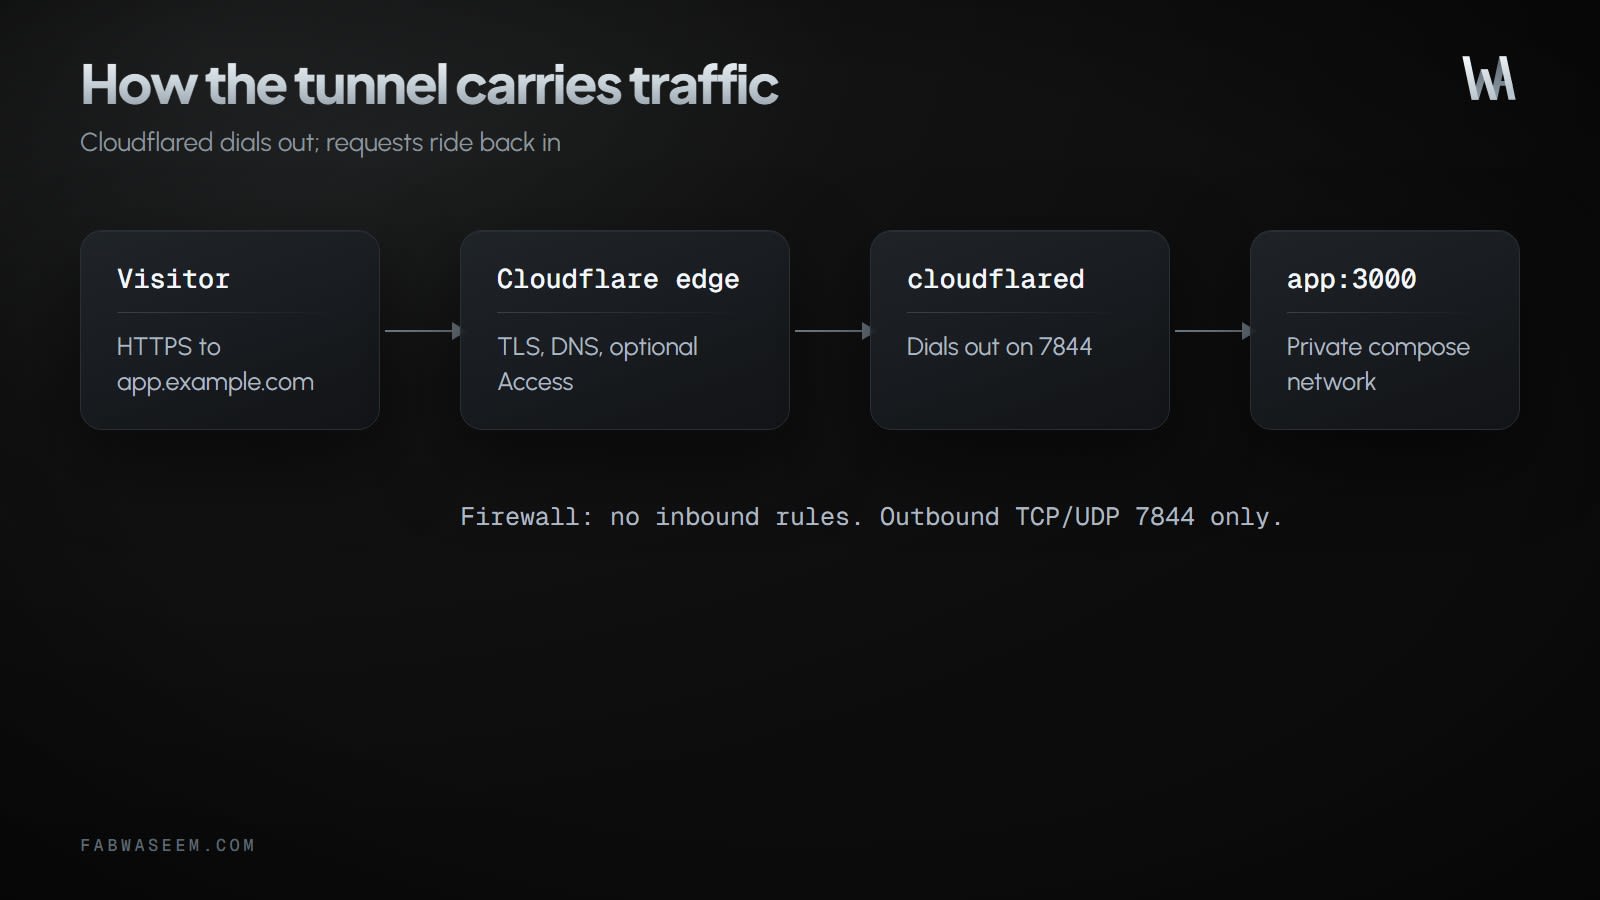
Cloudflare Tunnel connects a service on your server to Cloudflare's network through a small daemon called cloudflared. The daemon dials out to Cloudflare, and visitor traffic comes back over those connections. Because the connection is outbound, you do not need inbound firewall rules for the app.
Docker fits this model well. Your app containers sit on a private Compose network with no ports: mapping, and one extra container carries traffic in. Nothing on the host listens on 80 or 443, so there is nothing for a port scanner to probe, and Cloudflare terminates public TLS at the edge so you skip certificate renewal on the origin for public traffic.
How do you set up Cloudflare Tunnel with Docker Compose?#
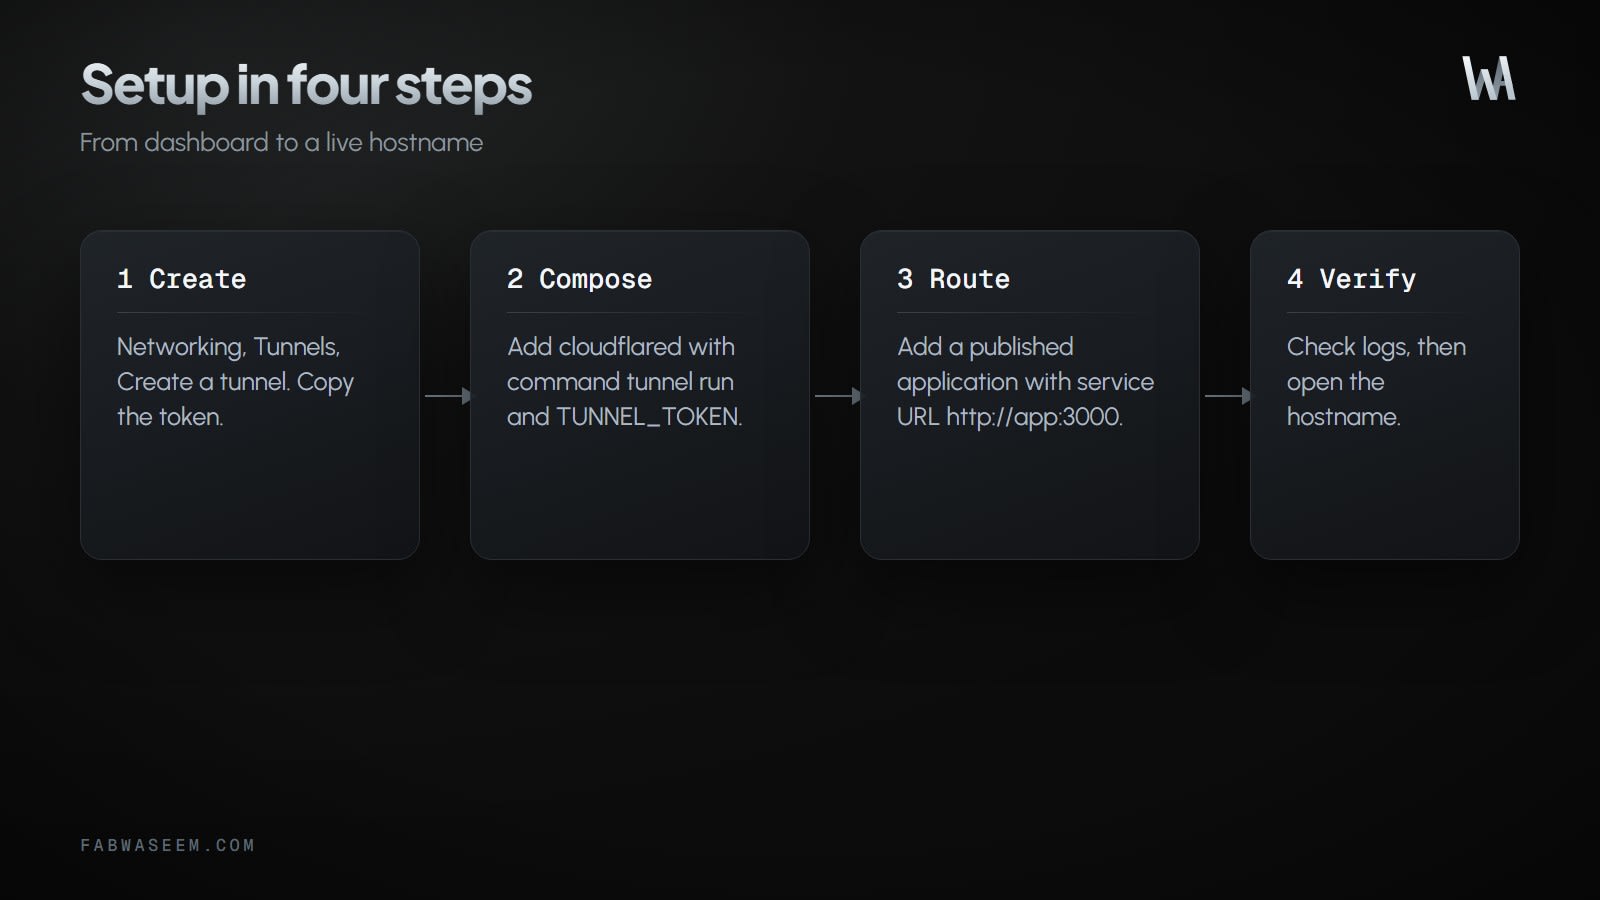
You need a domain that is already added to Cloudflare. The setup has four steps.
Step 1: Create the tunnel and copy its token#
In the Cloudflare dashboard, go to Networking > Tunnels and select Create a tunnel. Give it a name that describes what it connects, then select Create Tunnel. The dashboard shows an install command for your operating system. You only need the token from that command, because Compose will run the container for you.
Store the token in a .env file next to your Compose file and keep that file out of Git:
# .env
TUNNEL_TOKEN=paste-your-token-here
Treat the token like a password. Anyone who has it can run a connector for your tunnel.
Step 2: Add cloudflared to your Compose file#
Here is a minimal stack with a web app and the tunnel. Notice that the app service has no ports: entry.
services:
  app:
    image: ghcr.io/your-org/your-app:latest
    restart: unless-stopped
    expose:
      - "3000"

  cloudflared:
    image: cloudflare/cloudflared:latest
    restart: unless-stopped
    command: tunnel --no-autoupdate run
    environment:
      - TUNNEL_TOKEN=${TUNNEL_TOKEN}
    depends_on:
      - app
Both services share the default Compose network, so cloudflared can reach app by name. cloudflare/cloudflared is the official image on Docker Hub. Pin a specific tag in production instead of latest so an image update never surprises you.
Step 3: Add a published application route#
Open the tunnel in the dashboard, go to the Routes tab, select Add route, and choose Published application. Enter a subdomain, pick your domain, and set the Service URL. For the stack above that is:
http://app:3000Do not use http://localhost:3000 here. Inside the cloudflared container, localhost is the container itself, so the connection fails and visitors see a 502. Use the Compose service name and the port the app listens on inside its container.
Select Add route. The app is then reachable at that hostname. Multi-level subdomains such as api.eu.example.com require an Advanced Certificate, so stick to one level when you can. If you add an optional path to the route, your app still receives the full path, because Cloudflare does not strip or rewrite it. Use a URL Rewrite Rule or a local reverse proxy if you need rewriting.
Step 4: Start the stack and verify#
docker compose up -d
docker compose logs -f cloudflared
Look for log lines showing registered tunnel connections, then open your hostname in a browser. If the tunnel shows as healthy in the dashboard and the page loads, you are done.
What ports does cloudflared need outbound?#
The only required egress is port 7844 for both TCP and UDP, according to Cloudflare's firewall documentation. TCP carries the http2 protocol and UDP carries quic. The connector reaches region1.v2.argotunnel.com and region2.v2.argotunnel.com on that port.
Optional traffic on port 443 covers update checks and, if you enable it, validation of Cloudflare Access tokens. Blocking those may log an error, but cloudflared keeps running. If your host sits behind a strict firewall and the tunnel stays down, confirm that outbound 7844 is allowed before you debug anything else.
How do you make a Cloudflare Tunnel highly available?#
A single tunnel already opens four outbound connections from your origin to four different Cloudflare servers across at least two data centers, so one failed connection or data center should not take your site offline.
For host-level failover, run replicas. A replica is another cloudflared instance that uses the same tunnel. Each replica opens its own four connections, and Cloudflare forwards each request to the geographically closest replica, retrying other replicas if that connection fails. Replicas do not do round-robin or hash-based steering, so they provide failover, not load balancing. For load balancing, Cloudflare's documentation describes putting Cloudflare Load Balancers in front of multiple tunnels, typically one per data center.
Replicas also let you update a tunnel's configuration without downtime, since the other connector keeps serving while one restarts.
How do you protect the app once it is public?#
A tunnel hides your origin IP, but it does not authenticate anyone. Anything you publish is reachable by the whole internet. For admin panels, dashboards and internal tools, add a Cloudflare Access application on the same hostname so visitors must sign in before a request reaches your container.
Two habits keep the setup safe:
- Keep services off the host. Do not add
ports:to apps that only the tunnel should reach, so there is no second path around Cloudflare. - Keep the token out of images and repositories. Pass it through
.env, a secrets manager, or your deployment platform's environment settings.
When should you not use a Cloudflare Tunnel?#
A tunnel is the right default for HTTP apps, webhook receivers and admin tools. It is a poor fit when you cannot route a domain through Cloudflare, or when you want a platform to manage builds, deploys and certificates for you. In that last case, compare it with a self-hosted platform. The guides on Coolify vs Vercel and self-hosting Next.js with Coolify cover that route, and the Next.js Dockerfile guide shows how to build the image you would put behind the tunnel.
Key takeaways#
- Cloudflare Tunnel uses outbound-only connections, so you open no inbound ports and need no public IP.
- Run
cloudflare/cloudflaredin Compose withTUNNEL_TOKEN, and leaveports:off your app. - Set the Service URL to the Compose service name, such as
http://app:3000, neverlocalhost. - Allow outbound TCP and UDP on port 7844, or the tunnel will not connect.
- Each tunnel opens four connections; add replicas of the same tunnel for host failover.
- A tunnel is not authentication, so put Cloudflare Access in front of private tools.
FAQ#
Do I need to open any ports to use Cloudflare Tunnel?#
No inbound ports. cloudflared makes outbound connections to Cloudflare, and the only required egress is port 7844 over TCP and UDP.
Why does my Cloudflare Tunnel return a 502 error?#
The most common cause in Docker is a Service URL of http://localhost:PORT. Inside the cloudflared container that address points to the container itself. Use the Compose service name instead, and check that the port matches the one your app listens on.
Can I run cloudflared and my app in the same Docker Compose file?#
Yes. Put both services in one file so they share a network, then route to the app by service name. Add restart: unless-stopped to both so they come back after a reboot.
Should the Service URL use http or https?#
For a plain app container on a private Compose network, http://service:port is the usual choice. If your origin already serves HTTPS or redirects HTTP to HTTPS, read the HTTPS origins troubleshooting guide linked from Cloudflare's create a remotely-managed tunnel page before you pick the scheme.
Can I run multiple cloudflared replicas for the same tunnel?#
Yes. Replicas share one tunnel, each opens four connections, and Cloudflare sends each request to the geographically closest replica, retrying others if it fails. They give you failover, not round-robin load balancing.
Sources#
Questions
Share this guide
Comments
No comments yet. Questions, corrections and your own results are all welcome.
Be kind and stay on topic. No name needed: leave it blank and you post under an anonymous name that stays yours. Links get
nofollow; spam is removed. Your email is never shown and is only used for reply notifications you ask for. Privacy