AI SDK Human in the Loop: Approve Tool Calls Before They Run
How to add human approval to AI agent tool calls with the Vercel AI SDK: toolApproval, useChat approval UI, conditional rules, denial handling and forged-approval protection.

On this page
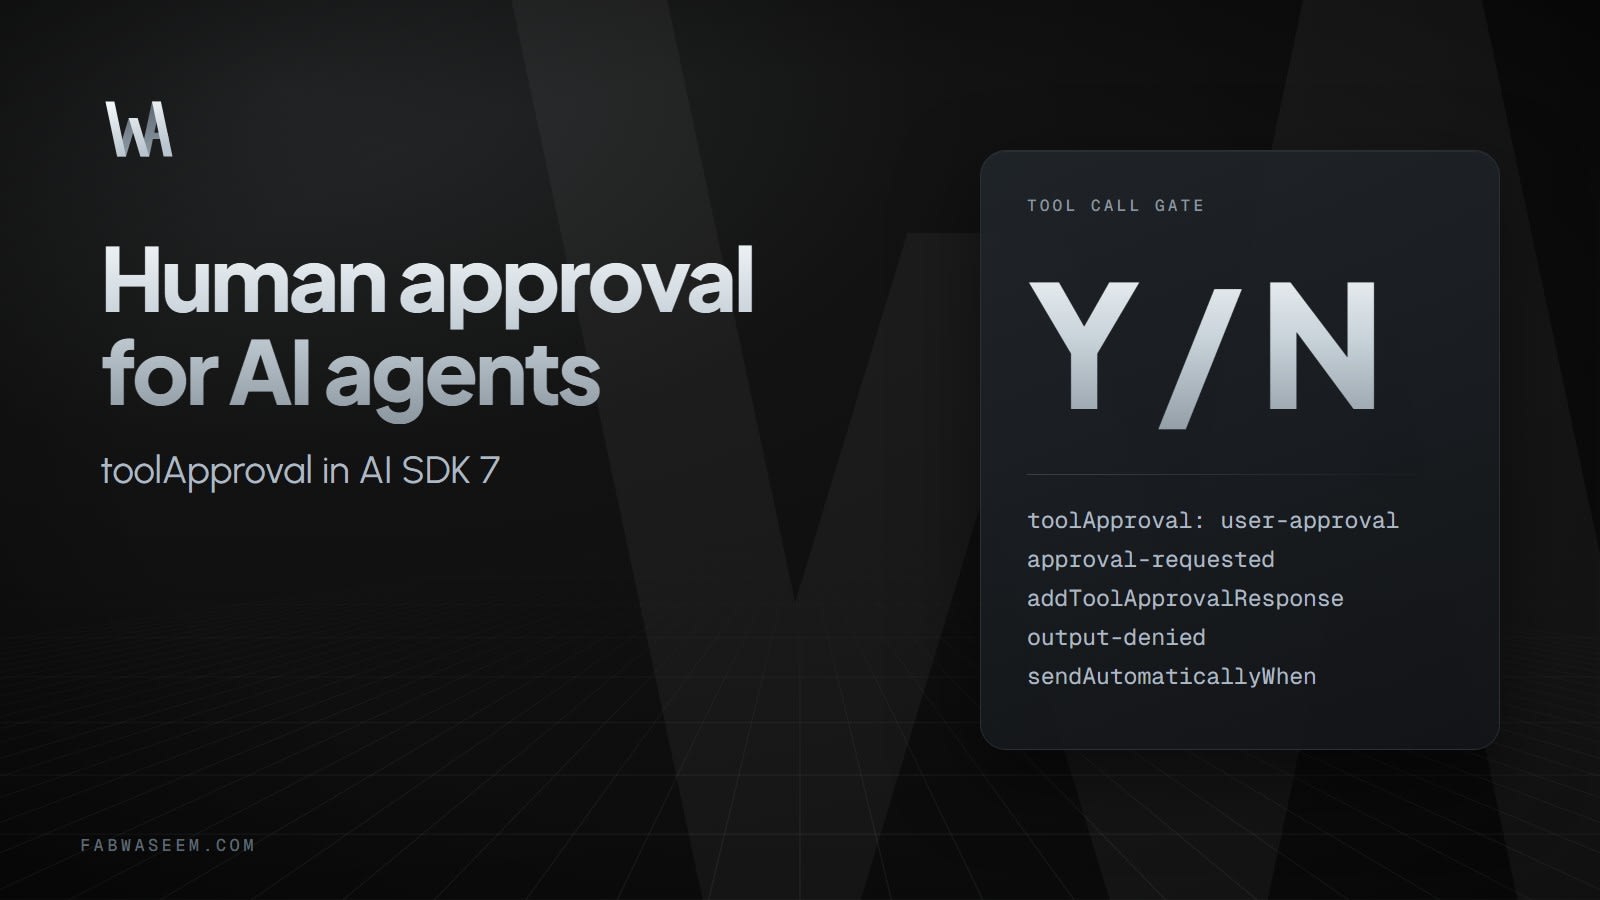
AI SDK human in the loop means pausing an agent before a tool runs, showing the user what the model wants to do, and continuing only after they click Approve. In the Vercel AI SDK you set this up with the toolApproval option on streamText, then handle the approval-requested state in useChat with addToolApprovalResponse. This guide walks through the server, the client, conditional rules and the mistakes that make an approval flow silently stop working.
Why add human approval to AI tool calls?#
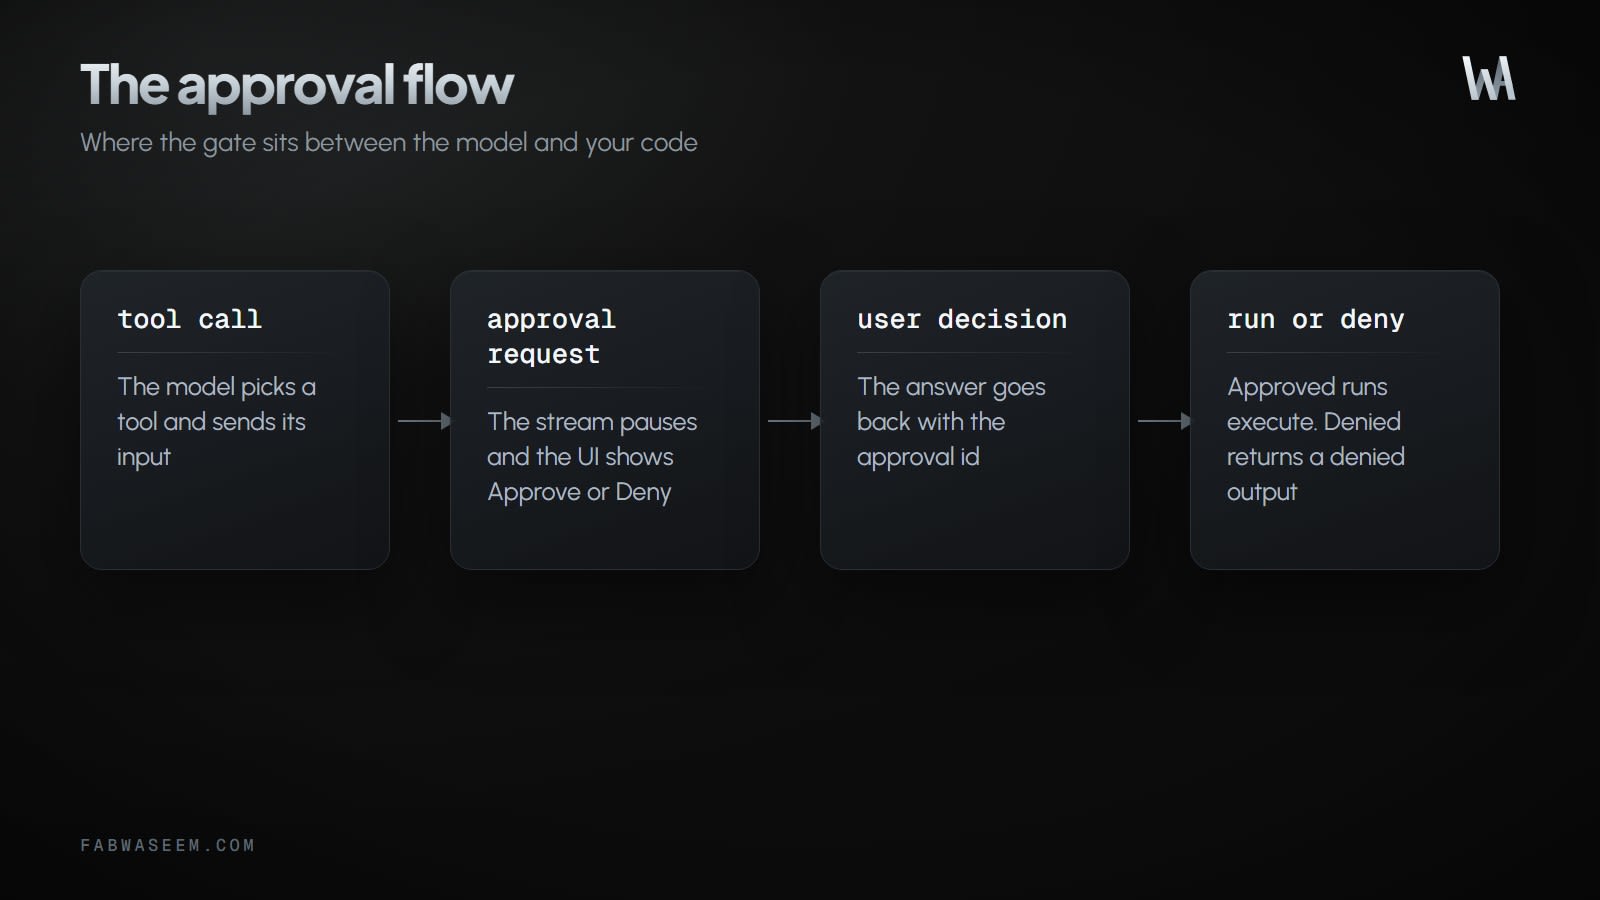
An agent that can send email, refund an order or delete a file will eventually do it at the wrong moment. Approval gates are the cheapest control against that. The model still decides what to call, but a person decides whether it runs.
The AI SDK documentation describes the gate as sitting between the model's tool call and the tool's execution. Approval-gated tools still run on your server, and only after the user approves. If you also expose tools over MCP, pair this with the guidance in MCP security.
Which AI SDK version do you need?#
The current stable line on npm is ai 7.x. In that line the docs configure approval with toolApproval on generateText, streamText or ToolLoopAgent. The older tool-level needsApproval: true property is documented as deprecated, so new code should not use it. Some older guides, including the AI SDK cookbook recipe, still show needsApproval; it keeps working but is deprecated. If you are still on an earlier major, start with the AI SDK 7 migration guide.
How do you set up tool approval on the server?#
Define the tool as usual, then name it in toolApproval with the status 'user-approval'. This follows the official Chatbot Tool Usage example:
// app/api/chat/route.ts
import {
  createUIMessageStreamResponse,
  streamText,
  tool,
  toUIMessageStream,
} from 'ai';
import { z } from 'zod';

export async function POST(req: Request) {
  const { messages } = await req.json();

  const result = streamText({
    model: 'anthropic/claude-sonnet-5.5',
    messages,
    tools: {
      getWeather: tool({
        description: 'Get the weather in a location',
        inputSchema: z.object({ city: z.string() }),
        execute: async ({ city }) => fetchWeather(city), // your own function
      }),
    },
    toolApproval: {
      getWeather: 'user-approval',
    },
  });

  return createUIMessageStreamResponse({
    stream: toUIMessageStream({ stream: result.stream }),
  });
}
Swap getWeather for your real tool, such as refundOrder or sendEmail. The execute function stays exactly where it was.
What are the four approval statuses?#
Each key in toolApproval takes one of four statuses, as a string or as an object with a type field:
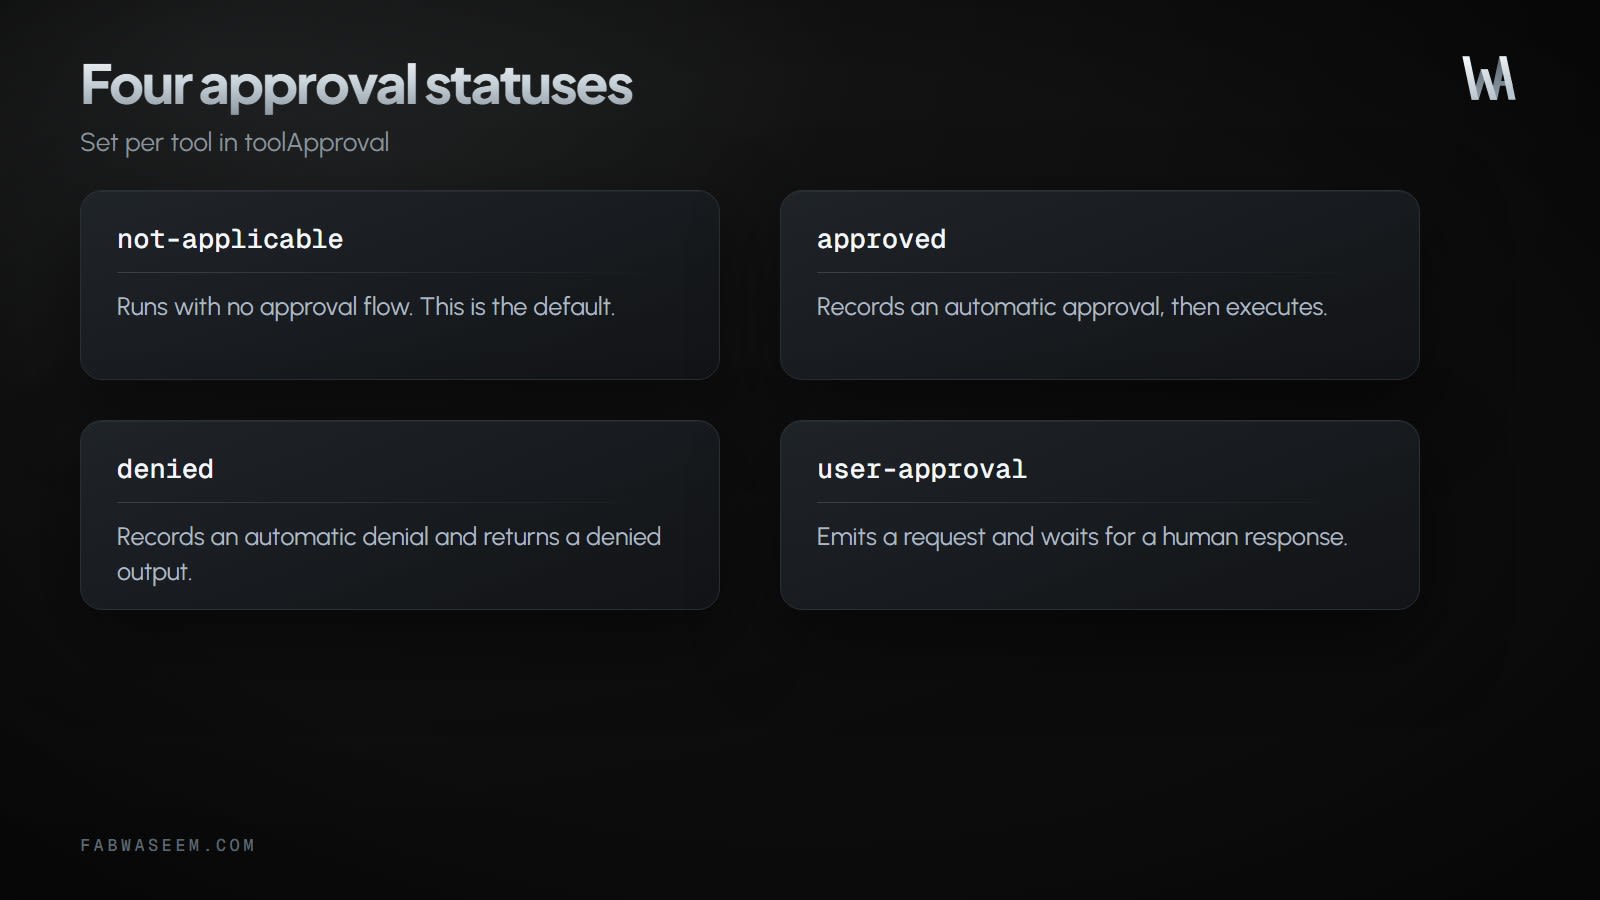
Object statuses accept a reason. For manual approval the reason goes on the request so the approver can see why a gate fired:
toolApproval: {
  runCommand: {
    type: 'user-approval',
    reason: 'filesystem changes require operator review',
  },
}
How do you build the approval UI with useChat?#
On the client, useChat exposes addToolApprovalResponse. Each tool call arrives as a message part whose state tells you where it is in the flow. You render Approve and Deny buttons while the state is approval-requested:
'use client';

import { useChat } from '@ai-sdk/react';

export default function Chat() {
  const { messages, addToolApprovalResponse } = useChat();

  return (
    <>
      {messages.map(message => (
        <div key={message.id}>
          {message.parts.map(part => {
            if (part.type !== 'tool-getWeather') return null;

            switch (part.state) {
              case 'approval-requested': {
                if (part.approval.isAutomatic) {
                  return <div key={part.toolCallId}>Checking approval…</div>;
                }
                return (
                  <div key={part.toolCallId}>
                    <p>Get weather for {part.input.city}?</p>
                    {part.approval.requestReason && (
                      <p>{part.approval.requestReason}</p>
                    )}
                    <button
                      onClick={() =>
                        addToolApprovalResponse({
                          id: part.approval.id,
                          approved: true,
                        })
                      }
                    >
                      Approve
                    </button>
                    <button
                      onClick={() =>
                        addToolApprovalResponse({
                          id: part.approval.id,
                          approved: false,
                        })
                      }
                    >
                      Deny
                    </button>
                  </div>
                );
              }
              case 'approval-responded':
                return (
                  <div key={part.toolCallId}>
                    {part.approval.approved ? 'Approved' : 'Denied'}
                  </div>
                );
              case 'output-available':
                return (
                  <div key={part.toolCallId}>
                    Weather in {part.input.city}: {part.output}
                  </div>
                );
              case 'output-denied':
                return <div key={part.toolCallId}>Denied.</div>;
            }
            return null;
          })}
        </div>
      ))}
    </>
  );
}
The docs list three states to handle: approval-requested (the user must decide), approval-responded (a decision exists, readable from part.approval.approved) and output-denied. Call addToolApprovalResponse only for manual approvals. Automatic decisions have part.approval.isAutomatic === true and already arrive in the stream.
Why does nothing happen after I click Approve?#
This is the most common problem. Without auto-submit, nothing continues after an approval. Either call sendMessage yourself or pass sendAutomaticallyWhen:
import { useChat } from '@ai-sdk/react';
import { lastAssistantMessageIsCompleteWithApprovalResponses } from 'ai';

const { messages, addToolApprovalResponse } = useChat({
  sendAutomaticallyWhen: lastAssistantMessageIsCompleteWithApprovalResponses,
});
With that in place, the message is resubmitted once every approval in the last step has an answer. The server then runs execute for approved calls and tells the model about denied ones.
How do you require approval only for risky inputs?#
Gating every call trains users to click Approve without reading. Make the gate conditional by passing an async function that inspects the input and returns 'user-approval' or undefined:
const result = await generateText({
  model: 'anthropic/claude-sonnet-5.5',
  tools: { processPayment: paymentTool },
  toolApproval: {
    processPayment: async ({ amount }) =>
      amount > 1000 ? 'user-approval' : undefined,
  },
  prompt: 'Send $1500 to the contractor',
});
Per the docs, only transactions over 1000 need approval and smaller ones run automatically. You can also pass a single generic function that receives toolCall, tools, toolsContext, messages and runtimeContext and decides for every tool in one place.
What happens when the user denies a tool call?#
On denial the model receives an execution-denied tool result, including the reason you pass to addToolApprovalResponse. Left alone, a model may simply retry the same call. The docs suggest adding an instruction such as "When a tool execution is not approved, do not retry it" so the assistant explains that the action was not performed instead.
An approval reason behaves differently: it is recorded on the message part for your UI or audit trail and is not sent to the model. It is not a channel for passing data to a tool. If you need extra input from the user, use a client-side tool with addToolOutput instead.
How do you stop a forged approval?#
useChat resends the whole message history on every turn, so a modified client could fake an approval. For sensitive tools the docs add a server secret so the server can verify it issued the approval:
const result = streamText({
  model: 'anthropic/claude-sonnet-5.5',
  messages,
  tools: { deleteFile },
  toolApproval: { deleteFile: 'user-approval' },
  experimental_toolApprovalSecret: process.env.TOOL_APPROVAL_SECRET,
});
The option is prefixed experimental_, so pin your ai version and re-check the docs on upgrades.
What about generateText and background agents?#
Server-side calls do not pause. With generateText the call completes and returns tool-approval-request parts in result.content. You collect those, create a tool-approval-response for each (approvalId, approved, optional reason), push them as a tool message and call the model again. That makes manual approval a two-call flow, which suits an agent that waits for a human in Slack, a dashboard or a queue. For queue-driven agents, see an AI automation pipeline with BullMQ. Provider-executed tools ignore toolApproval, because it only governs tools the SDK runs locally.
Key takeaways#
- Use
toolApprovalwith'user-approval'; the tool-levelneedsApprovalis deprecated. - Handle
approval-requested,approval-respondedandoutput-deniedin your UI. - Set
sendAutomaticallyWhen: lastAssistantMessageIsCompleteWithApprovalResponses(or callsendMessageyourself), or nothing continues after a click. - Gate by input (for example amount thresholds) so approvals stay meaningful.
- Tell the model not to retry denied calls.
- Add a server secret for destructive tools so a client cannot forge an approval.
Questions
Share this guide

Comments
No comments yet. Questions, corrections and your own results are all welcome.
Be kind and stay on topic. No name needed: leave it blank and you post under an anonymous name that stays yours. Links get
nofollow; spam is removed. Your email is never shown and is only used for reply notifications you ask for. Privacy